Dying a Polyester Chiffon Gown- From Cream to Burgundy

When I was in college, we had a dance where all of the girls were supposed to wear white gowns. It looked beautiful that night, but there are not many occasions to wear a white dress and the dress went unworn in my closet for quite a while. When I needed a dress for my husbands military ball, I wanted to save some money and fix up my old dress instead of buying a new one. Worst case scenario, I ruin the dress and it continues to go unworn; best case scenario, I have a beautiful new dress to wear! After doing some research and looking at many beautiful and horrible dye jobs, I figured I was smart enough to dye the dress myself.

I knew my dress was made of polyester so I went in search of a polyester-friendly dye. Since my dress was white, I didn't have to worry about covering up an existing color or bleaching before hand. I wanted a dark red/burgundy color, so I definitely needed to make sure the color was saturated enough. I decided to buy iDye Poly in the color Crimson. Looking at the package it appeared to be the color I wanted, but the lining definitely came out more hot pink than I anticipated. It wasn't an issue for me because I had the chiffon layer on top, but be aware the color has more of a pinkish-purplish tone than a brown one. I got three of the dyes for around $6.00 each on amazon (they can also be found at Jo-Ann's).
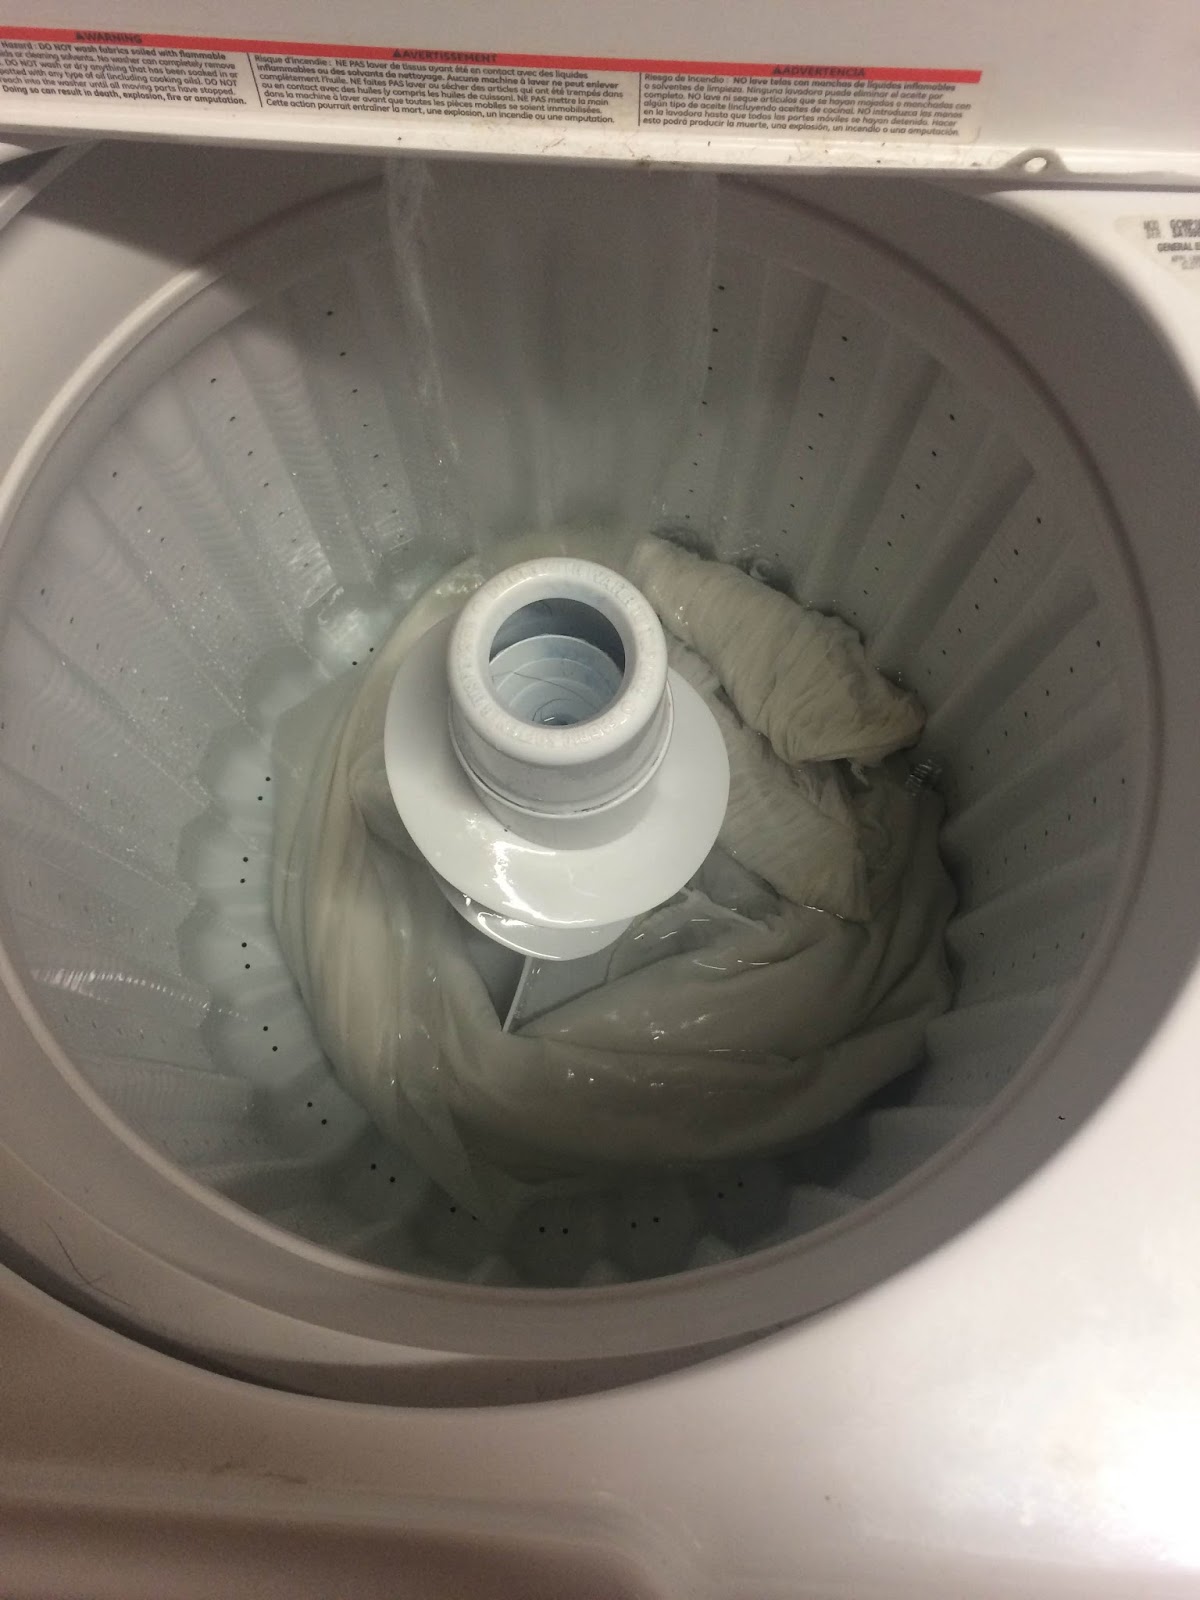
Before starting, I made sure to wash my dress to remove any dirt or dust that might have been left over from the last time I wore it or collected while it hung in my closet. I was worried about putting it in the washer since it was "dry-clean only," but again, the dress was already pretty much a lost cause. I put the load on "gentle" and fortunately the dress came out fine without any damage. I did NOT dry it since it was going to be dyed anyway.

While the dress was being washed, I made sure to prep my work area. I removed everything that was sitting on my counters and covered my stove with trash bags. The pot on my stove was a 7 gallon pot I found on sale for making jams. The jam pot was cheaper than a lobster pot, since it didn't have to be used for food. It came with some racks in the bottom, but once removed worked perfectly. The pot was probably the most expensive part of the dying process, since the dye was around $6.00 and I already had trash bags. I did buy a cheap pair of tongs from Wal-Mart, but in the end they were not long enough and I engineered a wire-hanger stirrer instead.
If I were to do this again, I would probably not get three packages of dye, as I only used two and probably only needed one. I also would find a way to cover my ceiling/microwave or do the project outside as the steam from the dye definitely tinted my light and my microwave vent pink. It came off with some soap and elbow grease but I would want to prevent having to do that extra work in the future.
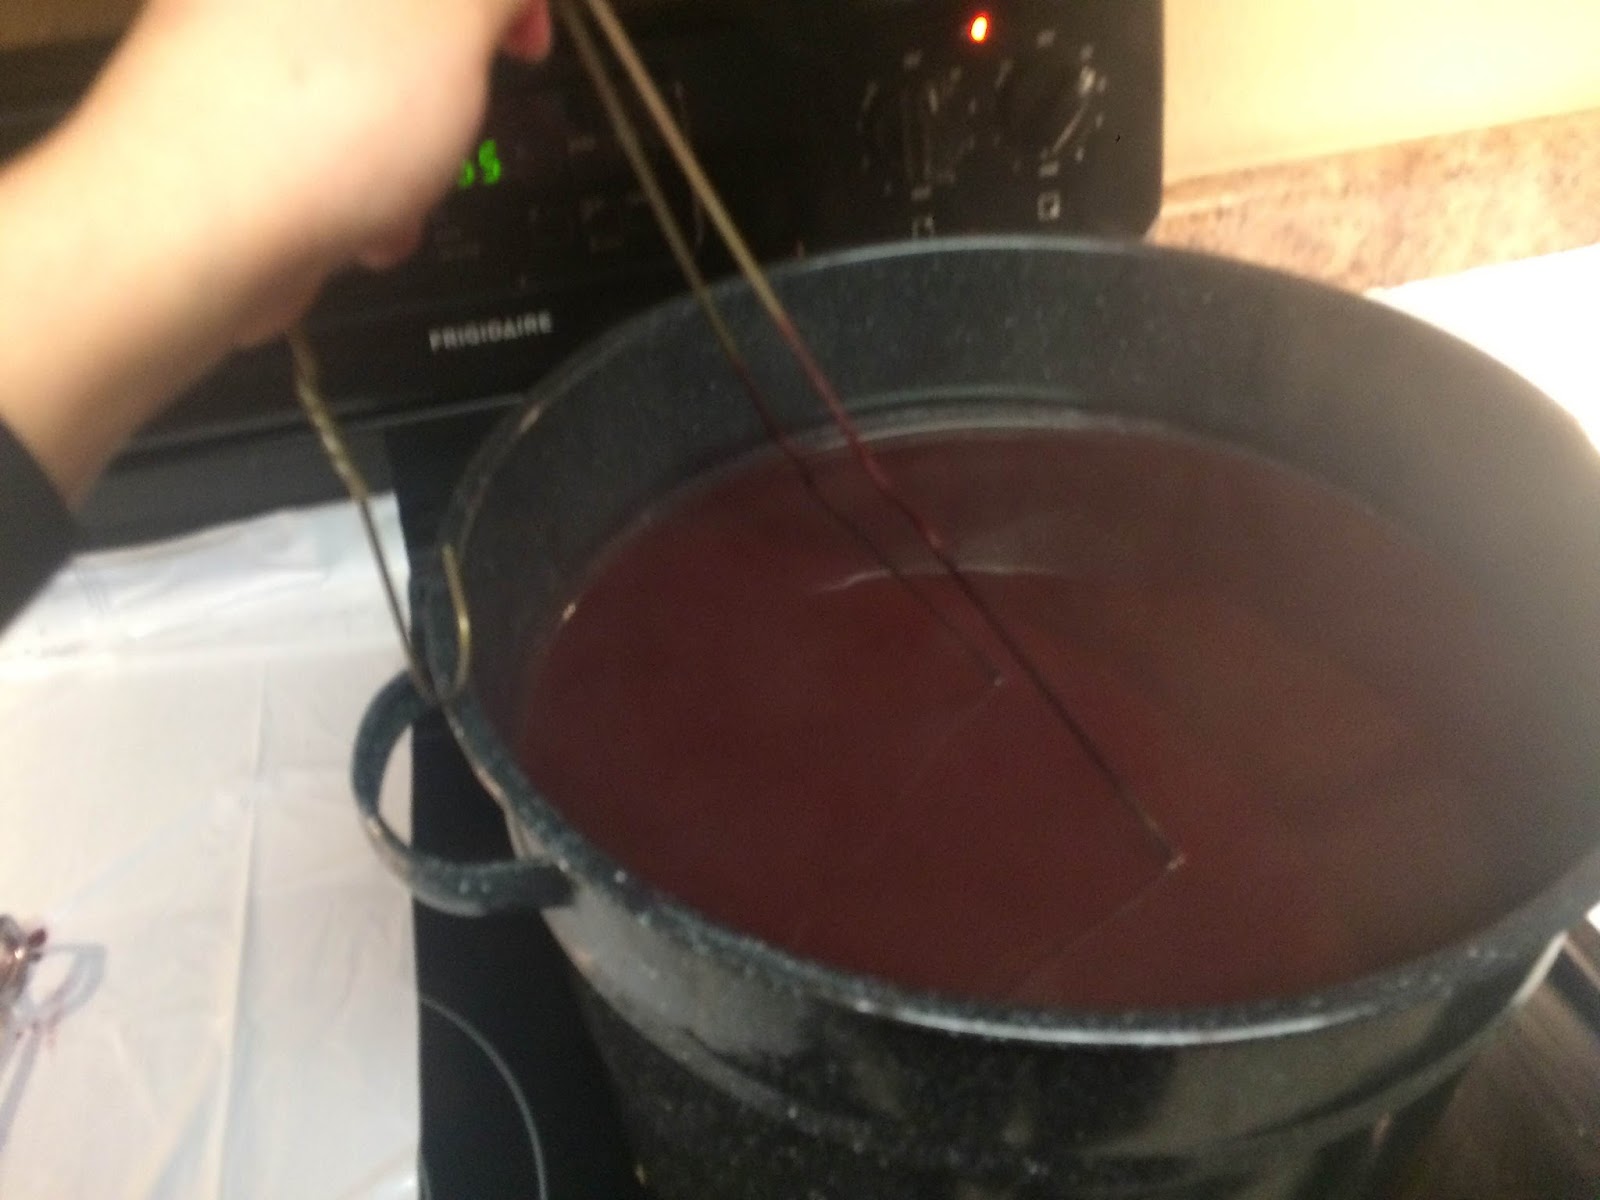
Once everything was ready, I started to boil the water. I was worried about the size of my pot being too small, as everything I had seen before had either been done in huge tubs outside or smaller pieces of fabric. To do a floor-length gown in a 7 gallon pot seemed like a challenge, but actually worked out quite well. The water was high enough that it covered the entire dress and still have enough room for me to stir. I wanted to make sure there was enough dye and my dress would not be spotty, so I added 2 packages of the dye. I originally started stirring using some cheap metal tongs, but they were not long enough and hard to maneuver so I jerry-rigged a wire-hanger to suit my purpose. As you can see, the hanger did change color so make sure you use something non-essential.
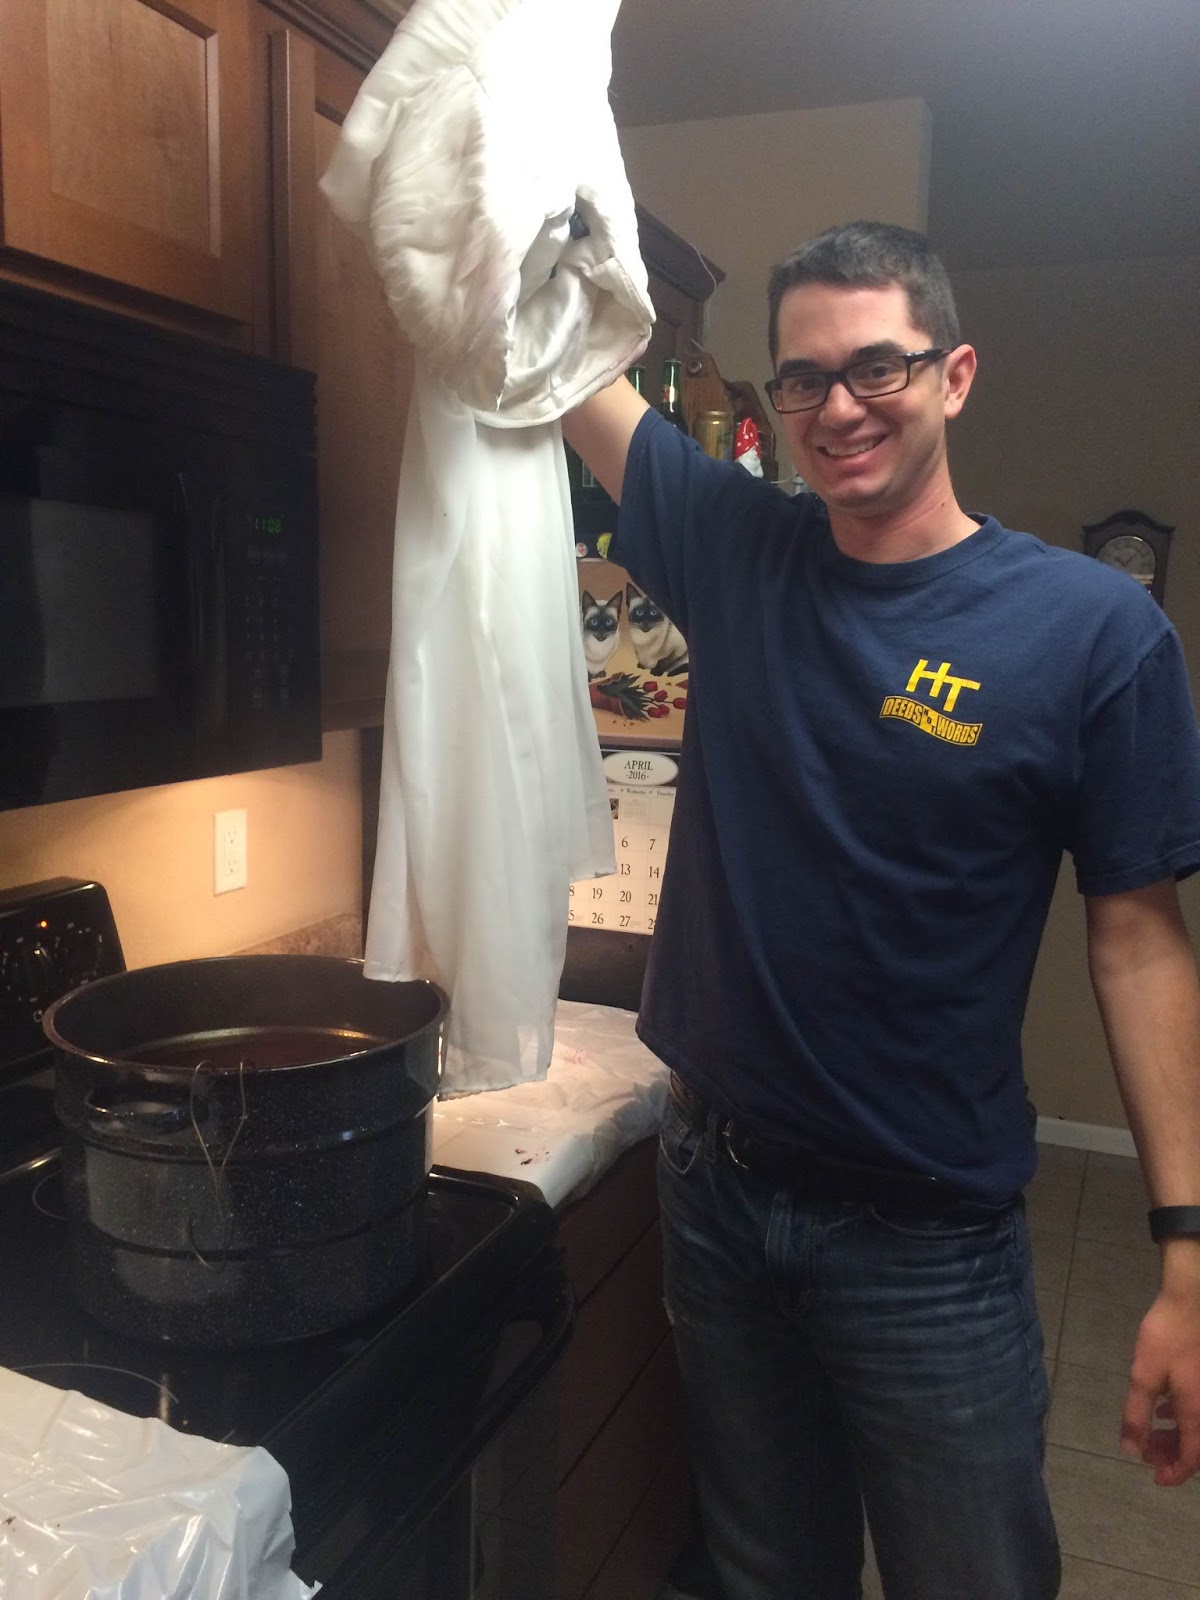
Once the dye came to a rolling boil, I had my husband help with adding the dress! Then started the hardest part of the entire process. It doesn't seem like much work to stand and stir a pot for a little bit, but trust me--it was long! I made sure to continue stirring my dress for two hours. I think the minimum time for the dye was 30 minutes, but I wanted to make sure was nice and dark so I let it sit for longer.My coat hanger stirrer was not very strong, so there were some points during this where my clumsy self flicked splats of dye all over my counter and shirt, so make sure you are wearing clothes you are okay with having some love spots. Like I said before, the dye definitely had some colored steam coming off of the pot and dyed not only my microwave vent, but my ceiling light and my fingernails! Well, yes. It was only my chipped, sad, fingernail polish, but still.

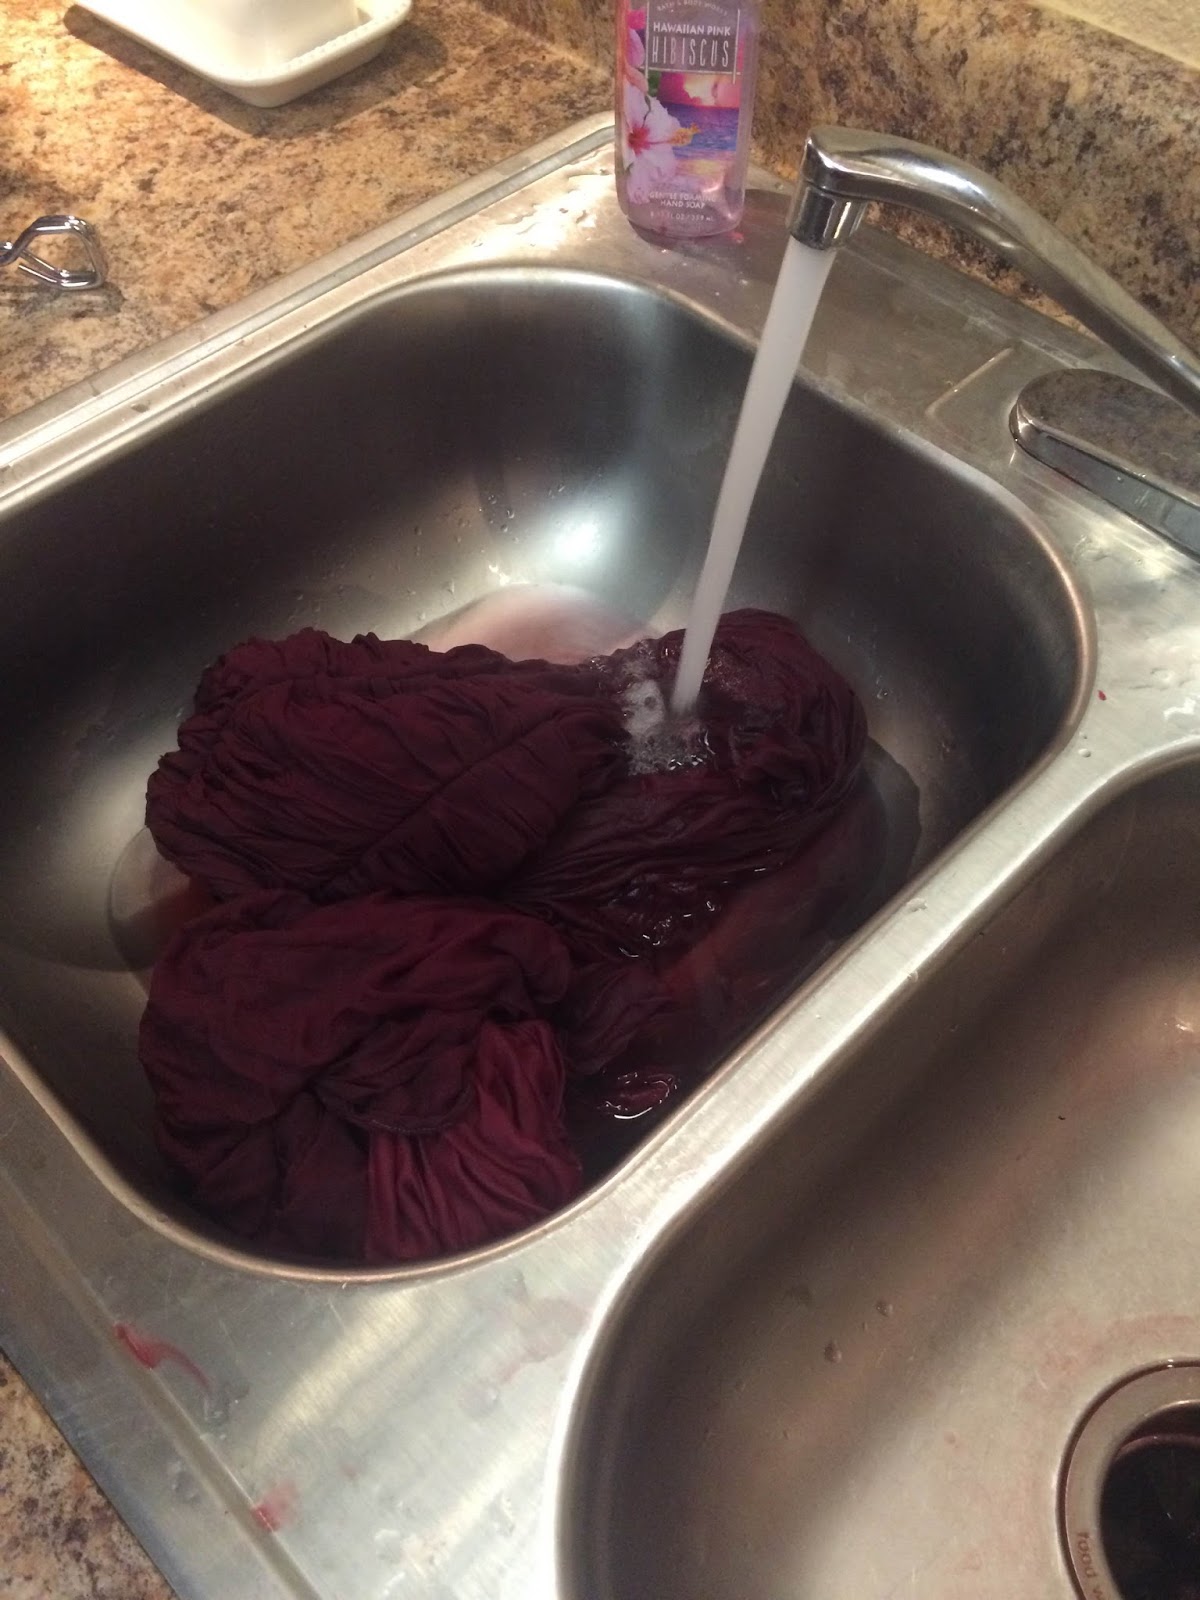
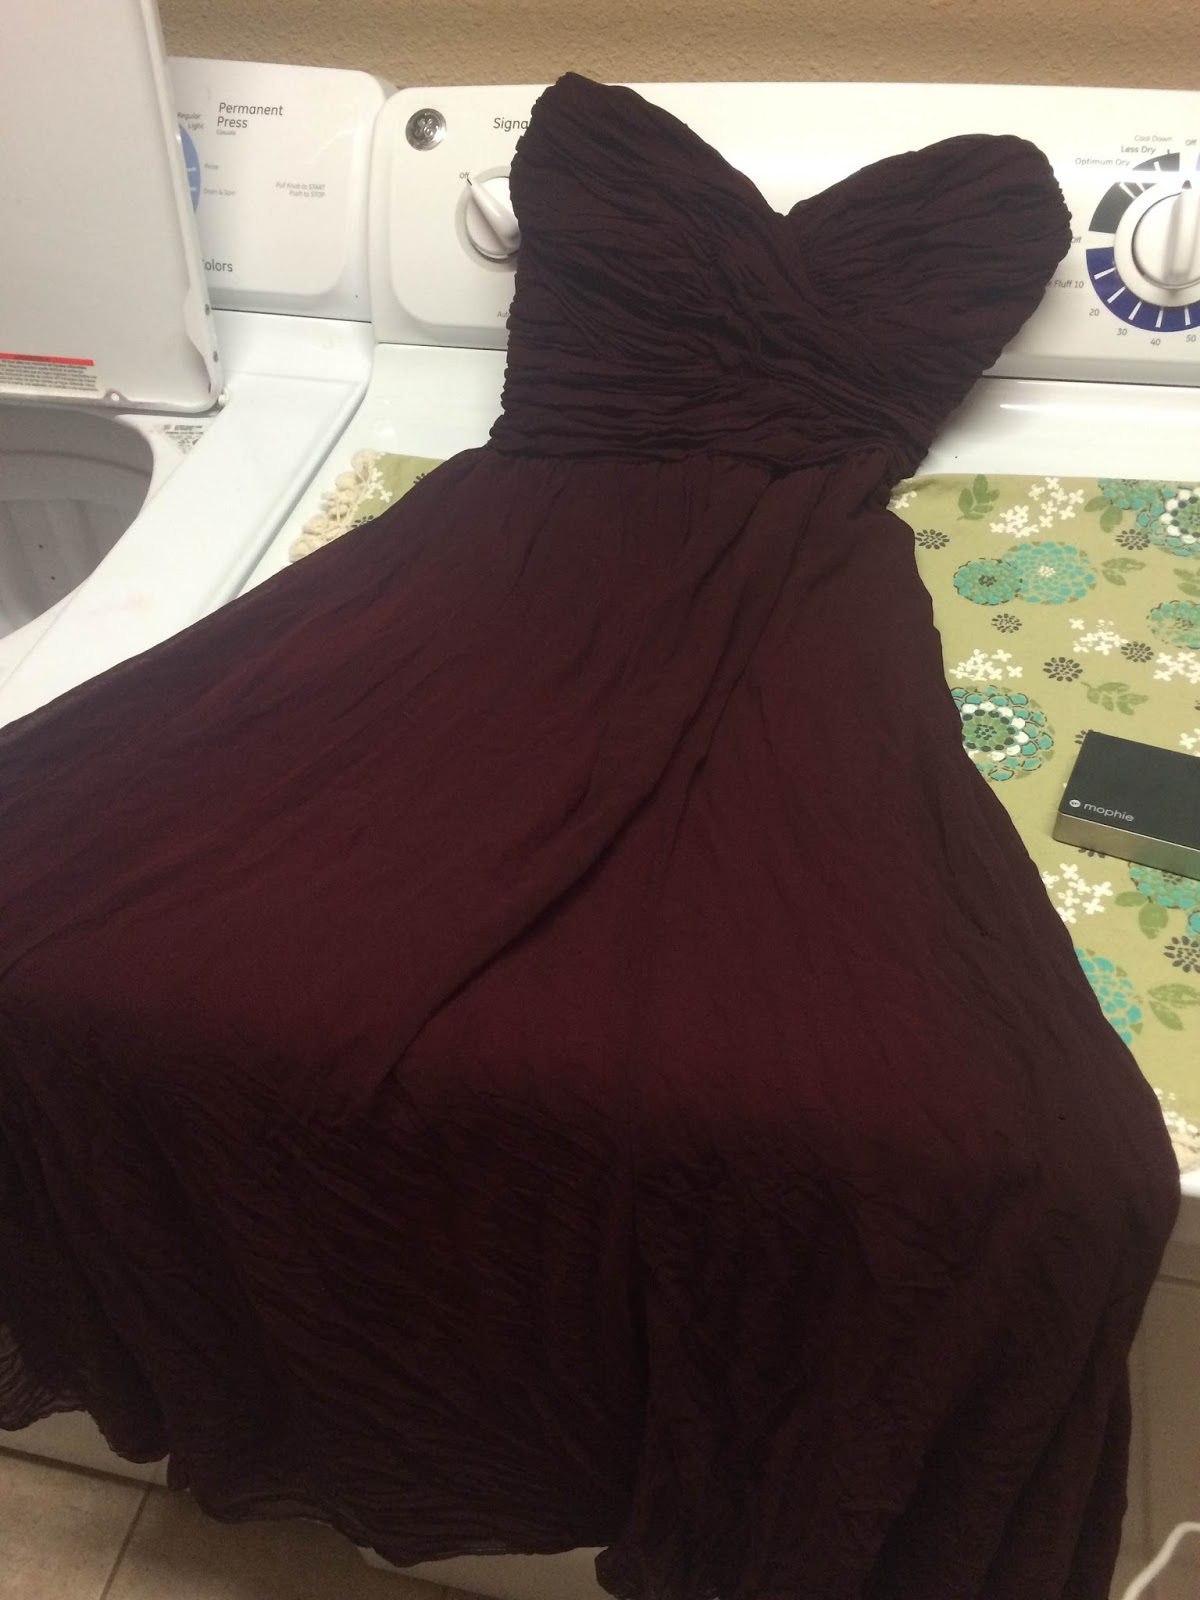
After two hours of near-endless stirring, I decided the dress looked good enough and rinsed it out in my sink. As you can see, there were some drops of dye on my sink and counter but as long as I was quick about it the dye didn't stain. Except for my shirt, which still has a few pink spots on it, and my dress, which still looks good after two events, the dye is very forgiving and allows a lot of time to clean before permanent damage. I made sure to rinse it with cold water and ring it out multiple times, because I knew any dye left over would stick to my washing machine. It looked like a lot of dye was coming out, but the dress held its color so I continued to rinse until the water ran (mostly) clean.

Off the washer next! I ran it two times through my washing machine on gentile with no detergent. I recommend washing it a few more times than I did to make sure all extra color is completely gone. Two times was not enough for me because the dress turned my skin and arms a slight pinkish color when I wore it to my event! After washing it a few more times, I didn't have that problem again.


That dress is to dye for!
ReplyDelete